Blue Yeti Mic Pattern Settings
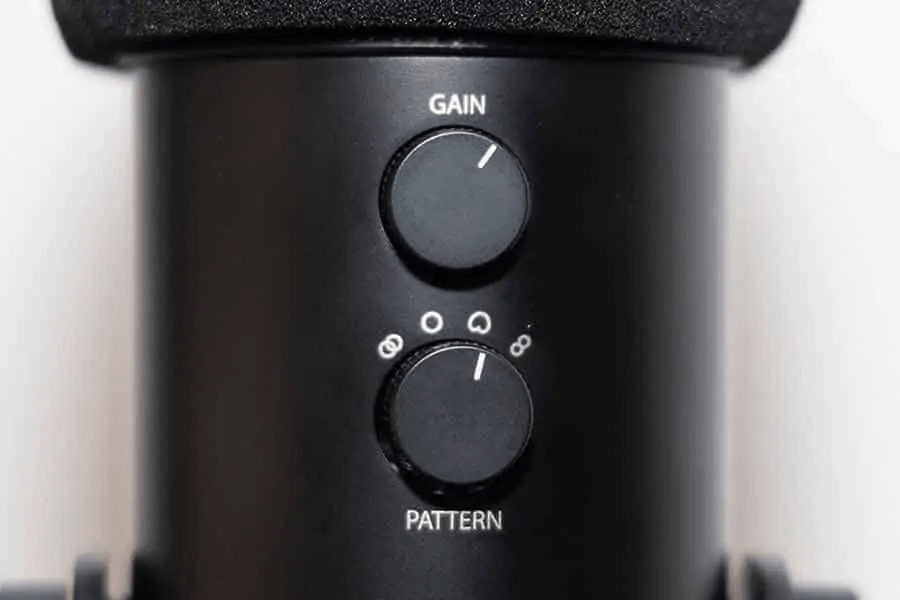
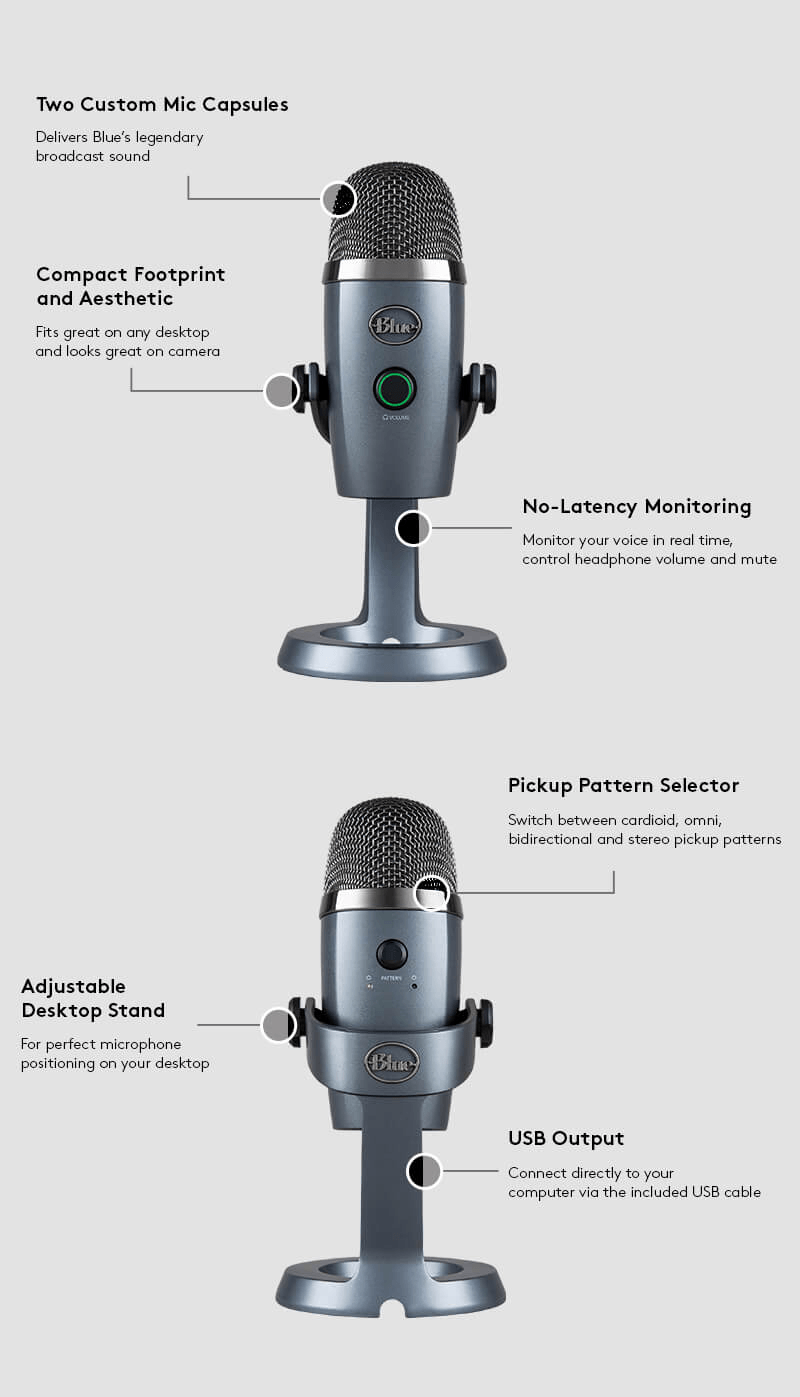
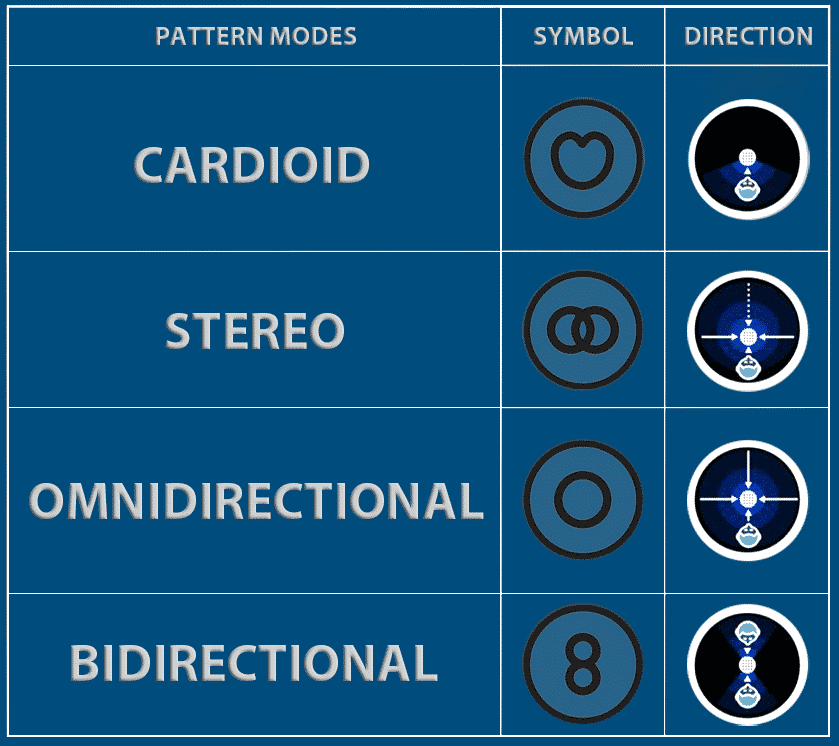
Blue Yeti Mic Pattern Settings - Only use the cardioid pattern. In a way, this is the best mode for a cleaner sound with more subtle highs. Web the four blue yeti microphone patterns or modes are bidirectional, cardioid, omnidirectional, and stereo. Web you can adjust the microphone’s gain level and sensitivity by turning the gain knob clockwise or counterclockwise, and choose from four different polar patterns (cardioid, bidirectional, omnidirectional, and stereo) that have been created with different recording purposes in mind by turning the pattern selector knob. You can also adjust the angle of the mic to reduce background noise. Each blue yeti pattern changes the microphone’s direction of maximum sensitivity and the direction or directions of maximum sound rejection. Avoid direct contact between the blue yeti mic and your desktop. Speak into the sensitive side of the blue yeti. Third, use a shock mount to reduce handling noise. Web best blue yeti settings. Choose the best blue yeti settings. As a condenser microphone, the blue yeti has a frequency response of 20hz to 20khz, which is sensitive enough to pick up even the faintest sound in the surroundings. Use a pop filter or windscreen to stop plosives. In a way, this is the best mode for a cleaner sound with more subtle highs. Web you can adjust the microphone’s gain level and sensitivity by turning the gain knob clockwise or counterclockwise, and choose from four different polar patterns (cardioid, bidirectional, omnidirectional, and stereo) that have been created with different recording purposes in mind by turning the pattern selector knob. Let’s take a look at what each mode does so that you have a better understanding of what the blue yeti mic is capable of. Third, use a shock mount to reduce handling noise. Web for best results, place the mic about six inches from your mouth. Web the four polar patterns (or modes) offered by the blue yeti microphone are: Second, use pop filters or windscreens to reduce plosives and breath noise. Each blue yeti pattern changes the microphone’s direction of maximum sensitivity and the direction or directions of maximum sound rejection. Web the four polar patterns (or modes) offered by the blue yeti microphone are: Web use one microphone per person. Web in this video i show you the blue yeti pickup patterns that your microphone can be set to in. Web best blue yeti settings. Third, use a shock mount to reduce handling noise. Web the four blue yeti microphone patterns or modes are bidirectional, cardioid, omnidirectional, and stereo. Web you can adjust the microphone’s gain level and sensitivity by turning the gain knob clockwise or counterclockwise, and choose from four different polar patterns (cardioid, bidirectional, omnidirectional, and stereo) that. Speak into the sensitive side of the blue yeti. Web for best results, place the mic about six inches from your mouth. Let’s take a look at what each mode does so that you have a better understanding of what the blue yeti mic is capable of. Web in this video i show you the blue yeti pickup patterns that. You can also adjust the angle of the mic to reduce background noise. Web the four polar patterns (or modes) offered by the blue yeti microphone are: Web the four blue yeti microphone patterns or modes are bidirectional, cardioid, omnidirectional, and stereo. Speak into the sensitive side of the blue yeti. Web in this video i show you the blue. Web the four polar pattern settings available in the blue yeti microphone are cardioid, stereo, omnidirectional, and bidirectional. You can also adjust the angle of the mic to reduce background noise. Avoid direct contact between the blue yeti mic and your desktop. Third, use a shock mount to reduce handling noise. This means you have to configure it properly to. In a way, this is the best mode for a cleaner sound with more subtle highs. Speak into the sensitive side of the blue yeti. Each blue yeti pattern changes the microphone’s direction of maximum sensitivity and the direction or directions of maximum sound rejection. Web you can adjust the microphone’s gain level and sensitivity by turning the gain knob. Avoid direct contact between the blue yeti mic and your desktop. As a condenser microphone, the blue yeti has a frequency response of 20hz to 20khz, which is sensitive enough to pick up even the faintest sound in the surroundings. Web in this video i show you the blue yeti pickup patterns that your microphone can be set to in. Web use one microphone per person. Second, use pop filters or windscreens to reduce plosives and breath noise. Third, use a shock mount to reduce handling noise. This means you have to configure it properly to pick up an acceptable amount of noise. Web the four polar patterns (or modes) offered by the blue yeti microphone are: Web for best results, place the mic about six inches from your mouth. Each blue yeti pattern changes the microphone’s direction of maximum sensitivity and the direction or directions of maximum sound rejection. As a condenser microphone, the blue yeti has a frequency response of 20hz to 20khz, which is sensitive enough to pick up even the faintest sound in. In a way, this is the best mode for a cleaner sound with more subtle highs. Second, use pop filters or windscreens to reduce plosives and breath noise. Web in this video i show you the blue yeti pickup patterns that your microphone can be set to in order to achieve the ideal r. Use a pop filter or windscreen. Web you can adjust the microphone’s gain level and sensitivity by turning the gain knob clockwise or counterclockwise, and choose from four different polar patterns (cardioid, bidirectional, omnidirectional, and stereo) that have been created with different recording purposes in mind by turning the pattern selector knob. Web the four polar patterns (or modes) offered by the blue yeti microphone are: Web the four blue yeti microphone patterns or modes are bidirectional, cardioid, omnidirectional, and stereo. Web for a clearer listening experience, turn up the volume knob. Let’s take a look at what each mode does so that you have a better understanding of what the blue yeti mic is capable of. Avoid direct contact between the blue yeti mic and your desktop. You can also adjust the angle of the mic to reduce background noise. In a way, this is the best mode for a cleaner sound with more subtle highs. Web use one microphone per person. Choose the best blue yeti settings. Speak into the sensitive side of the blue yeti. Use a pop filter or windscreen to stop plosives. Third, use a shock mount to reduce handling noise. Each blue yeti pattern changes the microphone’s direction of maximum sensitivity and the direction or directions of maximum sound rejection. Only use the cardioid pattern. As a condenser microphone, the blue yeti has a frequency response of 20hz to 20khz, which is sensitive enough to pick up even the faintest sound in the surroundings.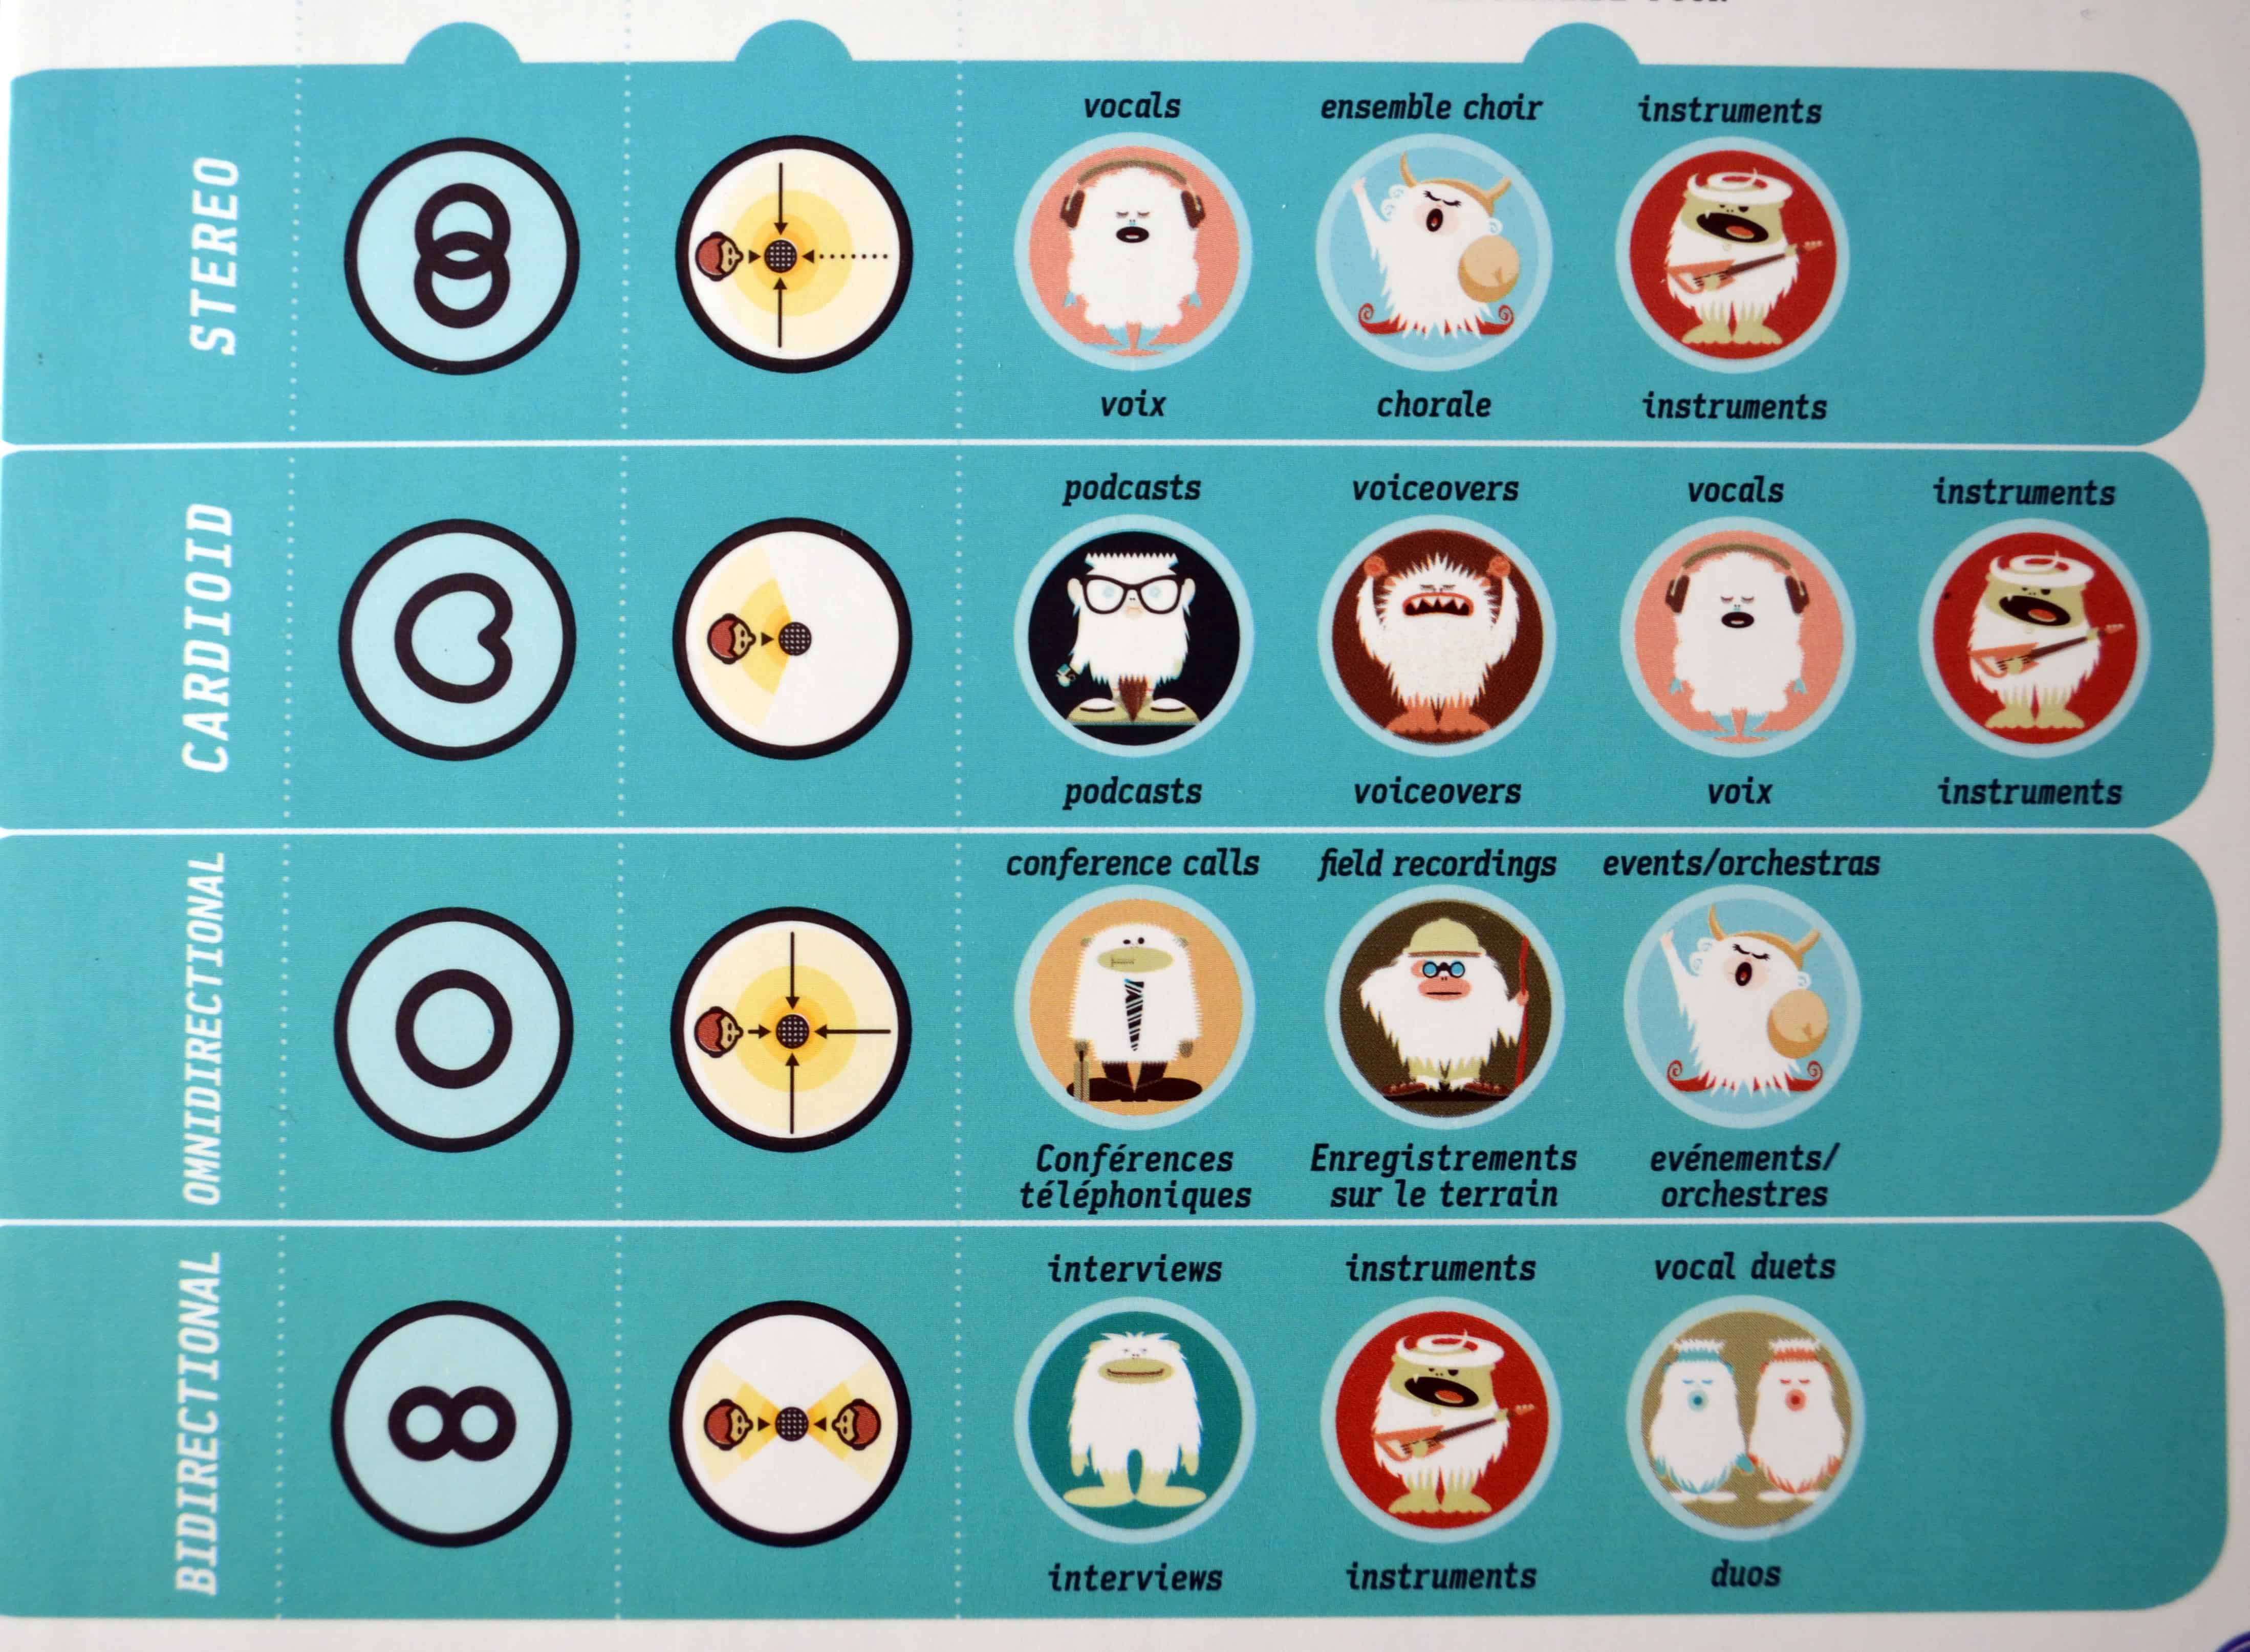
Blue Microphones Yeti Review
![Best Settings For Blue Yeti Microphone [Expert Guide]](https://www.becomesingers.com/wp-content/uploads/2020/10/Blue-Yeti-Pattern-Settings.png)
Best Settings For Blue Yeti Microphone [Expert Guide]

How to Make Your Blue Yeti Sound Like a Professional Studio Mic [BEST

Best Settings For Blue Yeti Microphone Guide) (2022)
All About Blue Yeti Mic Pattern Settings Hollyland

Blue Yeti Microphone Vintage White Ultimate Edition UnBoxing & Review
All About Blue Yeti Mic Pattern Settings Hollyland

Blue Yeti Tutorial How To Use The Blue Yeti Microphone To Get Clear
Blue Yeti How To Use Your Microphone Record Settings 90 Second
Blue Yeti Microphone How To Set Up Dubois Knowell
Web For Best Results, Place The Mic About Six Inches From Your Mouth.
Second, Use Pop Filters Or Windscreens To Reduce Plosives And Breath Noise.
This Means You Have To Configure It Properly To Pick Up An Acceptable Amount Of Noise.
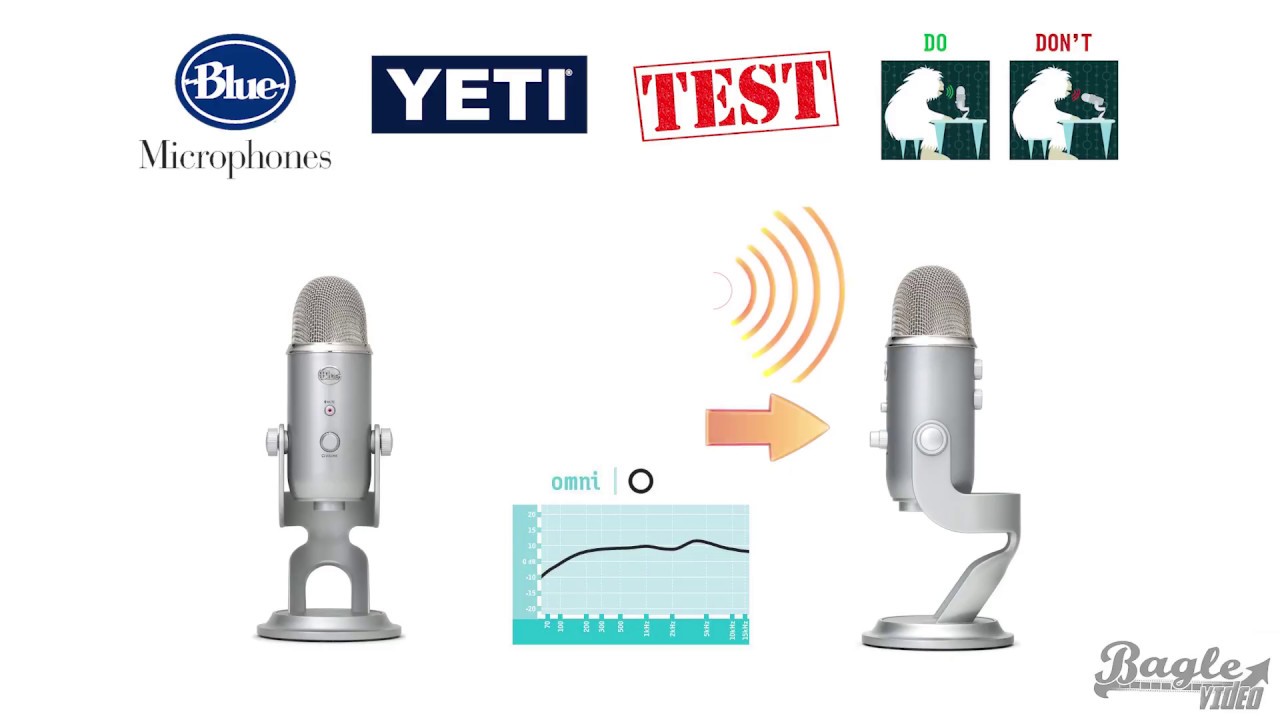
Web In This Video I Show You The Blue Yeti Pickup Patterns That Your Microphone Can Be Set To In Order To Achieve The Ideal R.
Related Post: